
Trimming the Right Way: Tips for Maintaining Carpet

Carpet is a flooring material that often turns homeowners away. Though hardwood and LVP can have similar issues in certain situations, carpet tends to stain faster, wear down quickly, and even start to have fiber-related problems, like fluffing, unraveling, or zippering. Since wet cleaning doesn’t happen frequently, unlike the weekly mopping routine for hard surfaces, doing the actual deep cleaning can make carpet seem gross and disgustings—perhaps a bad investment. For other homeowners, such as those with respiratory issues, carpet seems like a terrible idea because it can act as a dust magnet in a home and trap an absurd amount of allergens or irritants.
However, carpet doesn’t have to be so off-putting, gross, and frustrating to work with, and that goes for all carpet fibers, including the oh-so-feared wool carpets. Dedicating time at least once a week to vacuuming, diligence to taking care of any spills as they happen or make themselves known, routinely scheduling deep cleanings, and even maintaining other non-floor related house maintenance can make cleaning carpet easier and worthwhile, no matter the carpet fiber and lifestyle.
Vacuum & Dry Care
Everyone has a reason to put off vacuuming, and it’s okay—we promise! Life is chaotic, and cleaning can be put on the backburner. Our goal in this blog post is to provide homeowners with resources to make cleaning and maintaining their carpet easier, less nerve-racking, and see how carpet can be a substitutional investment. However, that isn’t to say vacuuming isn’t a problem; in fact, most homeowners do not vacuum enough, whether because there are limitations slowing them down or they are unaware. That’s why inventions such as auto robotic vacuums exist, to make vacuuming easier and take a load off of the home caretaker’s plate. (More on robotic vacuums later.)
It’s probably safe to say most homeowners are unaware of how often they actually need to vacuum. At minimum, carpet manufacturers recommend once a week, but for high-traffic areas, we are looking at 2-3 times a week or more, with some carpets and areas looking at once a day. That includes the dreaded stairs. More often than not, we meet with homeowners who are looking to replace their carpet because their stairs specifically are extremely worn down, with the carpet visibly soiled with debris, matted down and unable to bounce back to position, and even with the backing showing through. A major reason as to why stairs wear down faster is because they are not being vacuumed as often as they need to be, which is going to be more than once a week for most families. If the stairs are somewhat used during a week’s time, then they will need vacuumed much more regularly, but stairs to areas of the home like the basement that are never visited can get by with the weekly vacuuming.
As suggested by stair wear, vacuuming helps with the longevity and durability of any carpet. Vacuuming removes dirt and debris stopping the fibers from standing in their upright or preferred position, while also removing those same particles from damaging the fibers when moved around by walking. Furthermore, dirt can pull down fibers, which can cause them to lose their shape (especially if it is a polyester fiber that has a low memory in the first place) and eventually become less fluffy or soft on the underfoot. Regular vacuum also makes deep, wet cleaning easier, as the water and shampoo can penetrate into the fiber without anything trying to stop or block it from doing its job. In other words, vacuuming isn’t just for the cleaning factor of removing dirt, but vacuuming is one of the largest proponents in maintaining a carpet’s lifespan.
Picking the Right Vacuum
Now for the vacuum itself. Pile carpets made of synthetic fibers are going to want a vacuum that allows you to adjust the beater bar to different pile heights. The beater bar should go right up against the top of the fibers, as the beater will be able to move the fibers enough to shake dirt and debris off, while allowing the suction to actually pull out and remove the dust. Going too low will making moving the vacuum itself harder and will damage the fibers, thus causing more wear on the overall floor. The fibers, though heated together in its twist, can become unraveled with enough abuse or become stuck in the beater bar and be ripped out from the base.
Natural fiber carpets and looped carpets regardless of fiber type, on the other hand, should not come in contact with a beater bar; if possible, having a suction only vacuum is preferred, but a vacuum with the beater bar completely raised and unable to make contact with the carpet fibers will suffice until able to swap machines. The beater bar can cause wool carpets to have excessive fuzzing, which is extremely damaging for natural fibers, as the integrity of the carpet is being stripped away with enough abuse. After all, wool is going to be more similar to your hair than nylon or polyester, which means the fibers can fray, split, or shed a lot quicker and easier than synthetic alternatives. Looped carpets can be forced from the backing, thus unlooping the loop, and can now be ripped up. A loop in a carpet is also often a rather long, connected yarn without any breaks, so if one of the loops becomes unlooped, that same piece of yarn can now be sucked into the vacuum and force the following loops to also be ripped up, which is known as carpet zippering.
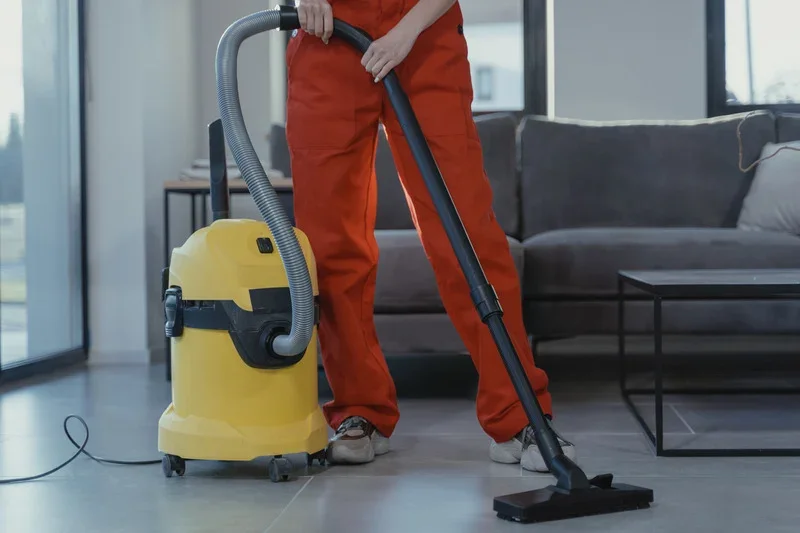
With the mechanics out of the way, we can now look at canister types: bagged or not bagged. Bagged vacuums are going to have a better filtration and suction power than reusable canister vacuums, which the carpet is going to prefer. For residential purposes, the suction offered by non-commercial grade bagged vacuums is perfect and will provide the best clean, especially since the filter is physically changed out more frequently than canister vacuums. That also means for air quality purposes, bagged vacuums are going to be the most effective and provide the best benefit to those with respiratory issues at every step of the way—even the disposal portion of cleaning out the vacuum because bagged options tend to be cleaner during the disposal phase. Canisters, however, are going to be cheaper in the long run because replacement bags will not need to be purchased every so often, and homeowners aren’t going to have to deal with trying to put on the bag every time it needs replaced. However, the vacuum itself is going to need to be cleaned out more frequently because of the lower suction power going through the canister and with more places for dirt and debris to become trapped inside the vacuum. Ultimately, it arguably comes down to how clean you want your carpet and air quality to be.
Make sure to avoid battery-powered vacuums for regular cleaning for the extra suction power. Battery powered, plugless vacuums are good for daily or an easy, light cleaning, but this should not be the primary vacuum used to clean an area. Instead, opt for a standard plug vacuum to ensure the carpet receives the proper agitation and removal it needs to stay clean. For similar reasons, using a robotic vacuum can be risky or not worth using because they do not have near the suction power to deep clean the floor. They can be handy for light cleaning, but they should not be used for deep vacuuming.
Furthermore, robotic vacuums can potentially be harmful for your carpet. They work well for low-pile, cut synthetic carpets, which already have short fibers that won’t cause the robot to get stuck on the fibers and cause damage by ripping out some sections of carpet or otherwise damaging the shape and integrity of the fibers themselves. Even then, the robot will only be able to do a light surface clean due to its strength and beater-type—which is what you are going to want in an automatic vacuum anyway. Robotic vacuums also tend to move in the same pattern, which can cause traffic wear due to the wheels continuously flattening sections of carpet. The fibers can also start to fuzz early and show other signs of consistent wheel wear in the same location, which will wear down the life of the carpet. This becomes a more apparent problem with wool and other natural fibers, as touched on when discussing vacuums with adjustable or absent beater bars. In the end, robotic vacuums will be good for low-pile, cut carpets, as they will be less likely to improperly tease or tug at the fibers and will be able to provide enough surface level cleaning in between the weekly deep vacuuming. For natural fibers, high-pile carpets, or looped carpets, a robotic vacuum should be avoided at all costs.
Vacuuming Techniques
When it is time to vacuum, this step should be the last done during a cleaning routine. For instance, if you need to dust, vacuuming needs to come after dusting is completed in order to pick up the dust that ended up on the ground. This ensures the carpet is as clean as possible. Once you are ready to vacuum, start along the edges of where you are vacuuming using the hose and a soft bristle attachment, not the floor brush or the portion of the vacuum with the beater bar. Doing so will provide a more thorough cleaning and ensure the entire carpet is taken care of. Once the border of the room or rug is vacuumed, then you can reattach the hose to the base of the vacuum and start working as normal. Motions should be slow enough to allow the vacuum to work as efficiently as possible, pulling out as much debris as it can before moving away. For reference, you want to be moving the vacuum about 1 foot per second, so not too slow but not too fast. Focus on small sections at a time to ensure the entire carpet ends up being taken care of and to prevent yourself from becoming overwhelmed or tired. Doing so will make it so you won’t have to vacuum as often because you were thorough in the first place.
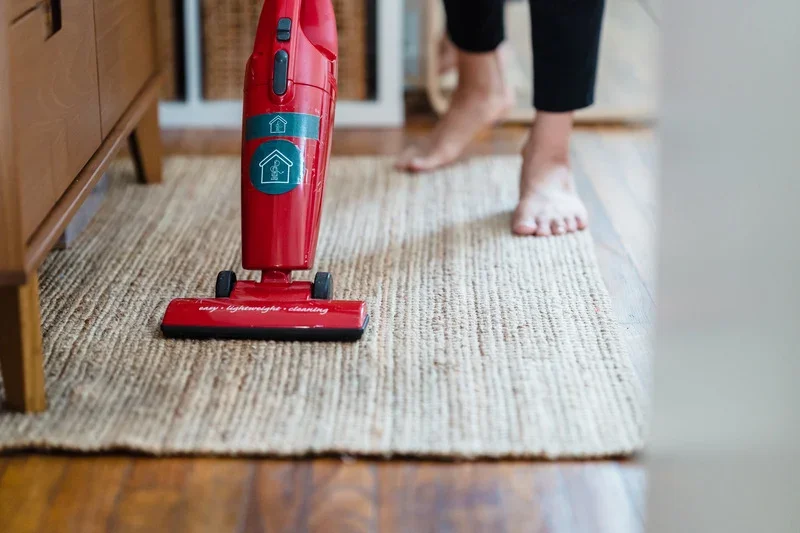
Even the smallest rugs need attention!
Furthermore, each vacuuming row should overlap on the previous row by about 50% to ensure the entire area is moved over. Once one direction is done, you should vacuum from at least one different direction to ensure the fibers are cleaned from all sides. We recommend, at minimum, doing this for high traffic areas, such as stair landings, rugs, and hallways, where possible. As touched on before, high traffic areas tend to be matted down due to the higher number of footsteps received in between vacuuming sessions, which means more dirt is trapped, and the fiber is at risk of not being able to bounce back. By moving in multiple directions in high-risk areas, the fibers can be thoroughly cleaned and will be able to stand in their proper position for even longer, extending the life of the carpet in even the most walked-on areas.
Make sure to clean your vacuum frequently. Removing the debris from the canister or bag as they reach around the half-way point or otherwise noted fill-amount will ensure the vacuum itself will be as efficencent for as long as possible. The sucked up dust won’t cause the suction power of the vacuum to decline while cleaning, nor will the motor burn out as fast for trying to work through a stuffy space, thus also increasing the value and lifetime of your vacuum. Check the canister or bag after every use and take care of any removal as needed after every time you vacuum. Make sure to check on your filter frequently, at least once or twice a month or more depending on how often you are able to vacuum. This will keep the vacuum lasting longer, while also stopping the spread of dirt from different areas of home, thus defeating the purpose of vacuuming in the first place. Furthermore, remember to check on the beater bar frequently. If you are checking on the filter, you should check on the beater bar at the same time to make sure they are both taken care of as often as they need to be. Using a sewing seam ripper to cut through hair and other small fibers can be handy.
Carpet Rakes
Carpet rakes can be good for carpets, but they can be as equally bad, if not worse, for your carpets. If someone is going to use a carpet rake, they should be used alongside vacuuming. Raking is not meant to be a replacement for vacuuming but rather functions as an extra layer of cleaning and allergen protection. Vacuuming should be done both prior and post raking the carpet to ensure the most effective dry cleaning, though carpet rakes work better when the carpet is wet and is going to provide a better overall clean after the carpet has been shampooed—and as discussed below, before the hydrogen peroxide. Raking after the carpet is mostly dry can also be a good option. Regardless, we recommend using a carpet rake during the wet cleaning cycle to make it easier for you to use the rake itself, protect the carpet from accidental damage, and provide a stronger clean.
However, it is important to note not all carpets can and should be raked. Most notably, any looped (berber) style carpets should never see a carpet rake, as the rake is extremely likely to snag on one of the loops and potentially damage that specific carpet fiber. Depending on the creation of the carpet itself, if one loop is pulled up hard enough, the row can start zippering. Zippering causes a section of a row of carpet—or the entire row—to pull up from the back, giving you a rather long yarn piece and a visual gap between rows of carpet where you can potentially see the backing itself. As a side note, not all carpet manufacturers place protections against a loop from ripping up other loops, and not all solutions are created equally. For instance, Shaw and Anderson Tuftex tuft their looped carpets in a way during manufacturing to provide the sturdiest loop, as what other companies do, but they go a step further and glue down the backing with an extra layer of adhesive to help prevent the fibers from being ripped out from the back. Shaw carpets, as a consequence, are going to be less likely to see loops being ripped from the carpet and are advertised to be more pet-friendly—there is a strong reason behind why! That’s why researching the vendor for your carpet can be a good idea: to know what can damage the carpet and how damage can spread.
As for the rake itself, a carpet rake should be made of a softer material like silicon or rubber because the material is going to be more gentle on the carpet fibers, regardless of the carpet density; for thicker , high pile (shag) carpets, copper or other metal rakes can be helpful, but they should be used with care, as they are more likely to pull at fibers and cause damage. Like most cleaning methods, try testing the rake in an inconspicuous spot to make sure the rake itself will work with your carpet and give you time to practice your technique with lower stakes. Techniques include always move with gentle motions, never use brute force. As previously mentioned, gentle forces will be a lot easier and provide a greater clean if the carpet is slightly wet and will work greater wonders during a wet cleaning cycle. Work in long strokes in the direction of the carpet fibers. Much like brushing hair, you usually brush down away from the head to prevent any snags, as well as make sure the whole section of hair is brushed through. A similar idea works with carpet, where you want to move in the direction of the carpet fibers to make sure nothing snags, the fibers are put in their proper place, and all fibers are thoroughly brushed through to remove all of the trapped debris.
A final note on carpet rakes—they can, but not always, help with matting problems. Depending on the matting itself and what the fibers are made out of, some mats can be fixed to a degree while other can’t. Nylon has a high memory, meaning it is going to want to bounce back to its original position more often and for longer, for as long as the fiber itself isn’t too structurally damaged. Polyester, on the other hand, has a lower memory and is more prone to matting damage over time. The sooner the mat is noticed and addressed, the better it will turn out to be for most carpet fibers.
**For wool carpets, make sure you check with the manufacturer beforehand. Wool rugs can heavily benefit from carpet rakes when done correctly, as it can help prevent shedding, but not all wools should be raked.
Spot Cleaning
Before moving on to wet cleaning, let’s turn towards the more-frequent spot cleaning. With thanks to our carpet vendors and recommendations of the Wool Safe Organization found here, we have created our own chart and guide on how to handle certain stains. We won’t be going into the steps here, but you can download the guide here. In this section, though, we will be going into what you should have for your spot removal kit (which, by the way, are also items that can help with clothing stains! A handy two-for-one stain removal kit!).
Clean, white towels
Always have a handful of clean, white towels ready for any stain. These can be small hand towels or full-sized bath towels. Just make sure they are white. Any other color has the risk of transferring its color to the carpet, while white cannot and will instead show us how much it has absorbed.
Small brush, spoon, and sponge
Have a small, soft bristle scrubbing brush dedicated to carpet on hand, as well as a spoon and sponge. We do not want to have cleaning tools used for other situations, as this can mess with the bristles, cause cross-contamination stains, and possibly introduce other substances we do not want with our carpet or other area the tool could be used to clean. The spoon is handy at removing excess of something when needed, and the sponge is another tool that can be used in the same way as the brush or towel when needed.
Solvent for removing greasy/oily stains
Carpet shampoo
DO NOT make a DIY cleaning shampoo for carpet! DIY options tend to leave behind soap residue, which can cause the fibers to wear down faster and become a dirt magnet. Find a carpet shampoo brand you can trust. Carpet shampoo is designed for carpet specifically, which means it is designed in a way to lift and suspend dirt, as well as extracted in a way that will not leave behind a sticky or unsightly residue behind. We recommend using a pet stain approved shampoo, even if you don’t have pets. The solution can be handy for other bodily fluids, like blood, or other similar substances, like egg whites.
Acetone or Nail Polish Remover
The acetone or nail polish remover should be used sparingly when needed, as they can cause more damage to the fibers. However, they are helpful at removing certain stains and should be on hand when needed.
Gum remover (solvent, gel, or freezing type)
Neutralising agents: acetic acid solution (vinegar) or 5% ammonia solution
Methylated spirits & turpentine or white spirit
These are extremely effective at handling oil or grease stains.
Rust Remover
You could probably leave this out of the care list, as the rust remover is for rust stains. However, this is risky, and in this situation, you are going to be better off reaching out to a professional for stain removal.
When it comes to actually using these chemicals and removing the stain, always blot, never rub. Gently pressing the white towel with the chemical on the stain will be more effective at removing the spot, whereas rubbing will cause the spot to expand in size and become harder to manage or cause more damage to the fibers. Make sure to have a dry towel to blot dry to ensure any excess water or other chemicals are removed, as leaving too much moisture can damage the fibers or cause mold growth in the carpet itself, on the backing, the carpet pad, and potentially the subfloor. Be cautious of using bleach, as bleach can remove the color of the carpet; if the carpet is solution dyed, it can technically take a dilute bleach mixture, but the bleach can still weaken the fibers and cause them to become brittle and fray and could mix with the stain to create a harmful substance.
Deep Cleaning & Wet Care
Now to move onto deep cleaning with water or steamer vacuums! If you have access to a carpet cleaner, note that some brands, like Rug Doctor, can actually void your carpet’s warranty. Always double check with the warranty information for your carpet, if possible, to see if the manufacturer recommends or condemns certain brands for home use. Home carpet cleaners are also meant to subsidize alongside professional cleaning, meaning a professional should still clean your carpets every 12-18 months for standard and light traffic homes, or every 6-12 months for heavy traffic homes (Most homes can get by with 12-18 months). Forgoing a professional cleaning can void your carpet labor and product warranty.
An important note for professional cleaning: professional equipment can reach water temperatures higher than what home carpet cleaners can accomplish because they can take a higher energy voltage, typically run off of a gas generator. Most home equipment can reach around 140°F or 60°C at its peak if given hot water to start with, and it should not reach higher than this temperature, as the equipment could malfunction and cause other problems. However, professional equipment can reach around 160°F to 200°F, or 70°C to 90°C, with some going higher. Carpet can start showing signs of damage to either the fiber or the glue above 200°F, so most cleaning technicians do not go above that temperature that often. The fibers can melt, which can make them stiff and unattractive. Heat does allow for a better clean, though, according to the Arrhenius Equation, which states chemical reactions can occur at a faster rate with heat thanks to the increase in kinetic energy going on with the molecules (Follow the link to a Wikipedia article for more information). The hotter the water, the more effective the clean will be because the water and cleaning solution will be able to react faster and more efficiently than with cold water. More money saved with less soap needed, thanks to chemical thermodynamics!
Professional cleaners also have greater access to various shampoos and chemicals designed for more niche fibers and situations. The technicians know more on how to properly dilute these chemicals for the safest and most effective clean, and their equipment is better suited to handle a proper distribution and agitation, as well as extraction. You are going to be better off with the yearly deep cleaning with a professional, who has equipment and knowledge on how to take care of specific carpet fibers, giving you the best clean and value for your carpet investment. A deep, professional clean will more than likely extend the life of your carpet by multiple years.
Pre-Steamer Phase
Before pulling out the carpet steamer itself, there are a couple of things that need to be done to allow for the most effective clean. Naturally, the first step is to do a thorough vacuuming. There is nothing more frustrating than getting dirt and grim wet, creating a mud mixture, and trying to extract the “soup” from your carpet. If you don’t typically do a deep vacuuming, like as described above, now is the time to truly do a deep vacuuming to make the actual wet cleaning go by easier and faster. After that is done, do any spot cleaning you may need to complete before moving on. If you are unsure what the stain is, move on to the next step.
Next, you are going to pre-mix your solution into a spray bottle mixed according to the shampoo directions. Around 1 gallon of solution will cover 100 square feet, so make sure to mix accordingly and use that amount of solution as close as possible. In other words, if you are carpet cleaning 100 square feet, spray one gallon of solution over the entire carpet as evenly as possible. Make sure to wear clean socks, shoes, or other feet coverings from this point forward to make sure your skin will not get irritated from the cleaning solution or from stepping on a wet floor for long periods of time. We strongly suggest pre-mixing and applying the shampoo, as this ensures the shampoo is diluted properly and will not be overapplied in one area of the carpeted area, leaving behind residue in one corner, while leaving the other side left without any actual solution to clean the carpet. A deeper, even clean throughout also means more money saved on shampoo because you know everywhere has enough, and you do not have to keep mixing unaware if everything has a good amount of shampoo. Furthermore, having the solution pre-mixed in a bottle allows you to focus on areas that needs to be spot cleaned before applying the solution anywhere else in the room.
Once the solution is applied, you are going to take a soft, yet a little stiff, bristled broom or carpet rake and gently—and we mean gently—brush the solution throughout the carpet. A soft bristled broom can be cut down about an inch to ensure the bristles are more stiff but are still going to be soft enough to not damage the fibers. This is known as agitating. Agitation is one of the key steps in the washing cycle, while allows the solution to properly reach all areas of the surface being cleaned, while also attaching itself and otherwise suspending the debris onto the surface, pulling everything from below upwards. Start in one section of the room, working as though you are deep vacuuming by moving in at least two directions, and eventually make your way to the exist. Make sure to let the solution dwell in the carpet fibers for at least 15 minutes, for this dwell time actually allows the shampoo to do its job and move the debris upwards from the base of the carpet fibers. For heavily stained areas, you can go back and do another gentle round of agitation on those specific spots to help boost the effectiveness of the shampoo.
Steamer Phase
Now we are ready to pull out the steamer. Make sure to use hot water that is no hotter than 140°F or 60°C, as your equipment is most likely not going to handle it well. Furthermore, if you are not a trained carpet cleaning professional, going to hot without knowing what the temperature threshold is for specific carpet fibers, you are more than likely going to damage your carpet; wool cannot go above a certain temperature, whereas other synthetic fibers can go a little bit higher. If 140°F is too hot for comfort, it’s okay to drop down to something a little cooler, perhaps around 120°F. DO NOT add any solution into the machine. Though most machines suggest adding the solution into the clean water tank or in a separate section, the machine may not dilute the shampoo properly, nor does it allow for the dwell time done in the previous step. This is why we added the shampoo already, so there is no need to add it again because it will cause you more problems in the end with residue.
Pro-Tip!
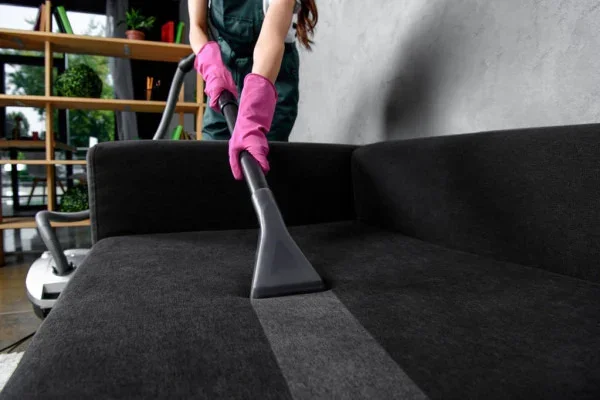
A similar sentiment regarding carpet cleaning techniques and spot removal can also be transferred to other textile surface, like upholstery. You could even try removing that grease or paint stain from an old shirt using similar spot removal techniques. Just remember to try the products in an unassuming area to make sure the products don’t further damage the piece!
You should be able to control when the machine dispenses from the clean water tank; if not, use a different machine. Start in the corner away from the exit, and pull the machine backwards, while dispensing clean water to rinse the carpet. Do not move forward in this stage. Once you have completed your first pass, move to the starting position again and dispense another rinse as you move backwards once more. Do not rinse while going forward, as the machine is not handled to move water in that direction and puts your carpet at risk of being oversaturated. After this pass, move to the starting position once more, but this time, do not dispense clean water. Instead, we are going to follow with two more passes of just vacuuming the water from the carpet to ensure the carpet will not be oversaturated and cause mold growth with the excess water and heat. In other words, you are going to do two wet passes, followed by two dry passes, before moving on to the next row. Repeat until you have reached the end of the room. Another note: much like vacuuming, move slowly to remove as much dirt and water as possible.
Post-Steamer Phase
Once completed, create another spray bottle solution, this time with hydrogen peroxide at no more than 6% concentration. Be cautious for this step if you have natural fiber carpets, like wool. Advise your carpet care warranty from the manufacturer and organizations such as Wool Safe, who specialize in maintaining natural fiber carpets. Make sure all window blinds and covers are closed to block as much UV rays as possible, as hydrogen peroxide reacts to UV rays and can discolor the carpet in the same way bleach can. Professional cleaning agents have hydrogen peroxide already mixed into their solutions, but consumer grade does not in order to keep the pH of the solution neutral and safe for all carpet fibers. Furthermore, we do not want to add hydrogen peroxide to our shampoo mixture at the beginning before steaming the carpet because certain cleaning agents may negatively react with the hydrogen peroxide, creating a toxic fume or substance that can harm you and the carpet. After the shampoo has been extracted, we are safe to add the hydrogen peroxide concentrate, lightly spraying onto the carpet. Around 2/3s cup of the concentration will get you about 100 square feet. Hydrogen peroxide acts as an another cleaning agent that can break down organic debris that could not be removed with the shampoo and steamer, which thus provides you with a better clean without residue, for the hydrogen peroxide will break down into water and oxygen as it breaks apart the organic debris.
We are going to go back with the same broom from earlier to groom the carpet, making sure the hydrogen peroxide is evenly distributed if applied and ensure the carpet fibers are in their upright position to allow for proper and faster drying. Fibers more than likely got crushed while walking on the carpet while cleaning it, so this grooming stage allows all fibers to be put in their proper place. If you used hydrogen peroxide, make sure you have clean foot coverings on, as the concentration will likely irritate your skin. Work your way to the exit, and do not walk onto the carpet until you are confident the surface is completely dried. Fans and other forms of air circulation can help speed up the drying process.
Once the carpet is dry—and make sure it is dry within 24 hours to prevent mildew or mold damage—do one final deep dry vacuum to remove any other soils the shampoo, hydrogen peroxide, or final grooming brought to the surface. This step also removes any other soap residues, giving a final, professional clean and feel.
Brief Overview
If you do not need an in-depth guide, no worries! Here is a condensed version of the article for a quick-glance:
1- Vacuum frequently, potentially more often than you think.
2- Vacuums should have adjustable beater bar heights. There is not a one-height-fits all when it comes to the beater bar. If you have wool, skip the beater bar.
3- Carpet rakes can be used on pile carpets, not looped. Use a rubber or silicon rake for most cases. Raking works best during a wet cleaning cycle.
4- Spot cleaning should be done as soon as you notice it. It doesn’t have to be scary!
5- Make sure to do an annual professional clean on top of your own wet carpet cleaning as necessary.
6- Spray on the shampoo to save yourself money and protect the carpet from catching too much soap-scum.
7- Make sure the carpet dries within 24 hours. Give it a vacuum after the carpet is dried from a wet cleaning.